User:MIDIMan/Ringslinger Revolution/Map Maker's Guide
| Note This guide assumes that you have read the manual in full to get an idea of how this gamemode works. |
Custom maps can be made for Ringslinger Revolution in any gametype! Some aspects of map-making for RSR hold for any gamemode, while some are specific to each gametype.
Firstly, Ringslinger Revolution is designed for use with Ultimate Zone Builder only! Make sure you are using this, not old Zone Builder.
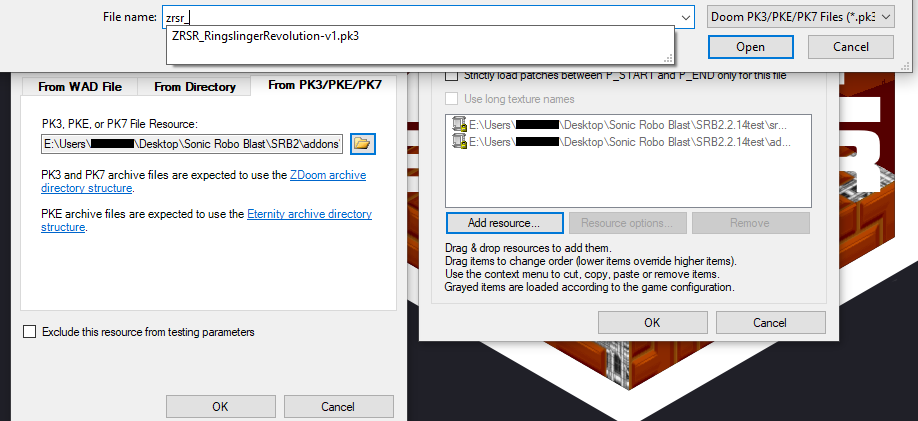
Secondly, in order to begin mapping for RSR, you'll want to add the main PK3 as a resource, like so. This will allow you to have access to the RSR Objects and gamerules as you map.
Finally, it may help for testing to define a level header for your map early on, and to add "Lua.RingslingerRev = true" at the bottom of the level header. This line is what causes RSR to recognize maps in singleplayer and co-op; Don't include this, and RSR won't work on your map. If you need help defining a level header, consult the "Level header" article.
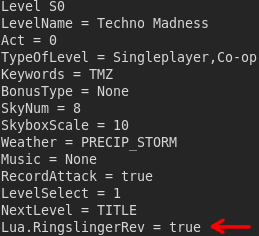
Note that defining whether or not a map is for RSR is independent of defining its actual gametypes, so make sure to do both!
Ringslinger Revolution: General Manual of Style
Preexisting Knowledge
First off, general level design principles still apply when building a map for Ringslinger Revolution. Though it incorporates gunplay and health into its gameplay loop, it remains half platformer and such tips are just as useful here as they are anywhere else. If you're new to level design, we recommend checking out Level Design 101/General information for some general advice on what to place in your level. It's not that in-depth, but it's a good starting point.
If you're new to using Ultimate Zone Builder, SeventhSentinel's livestream can provide some advice, or if you prefer technical breakdowns, UDMF documentation is available here on the wiki.
Now. Ringslinger Revolution. It's a platformer. It's a first-person shooter. It's both, so it takes cues from both when building levels.
When building Ringslinger Revolution maps, you additionally have access to the following Objects:
Health/Armor Pickups
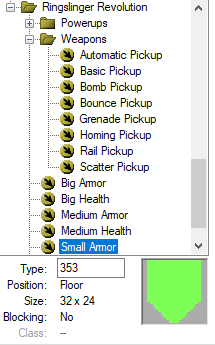
These keep the player alive. Health pickups restore health directly, while armor pickups supply armor. When a player with armor takes damage, the damage is split in half, with half going to health and half going to armor. In this sense, it acts as a buffer against damage. Note that a player can die while they still have armor - losing all health is the death condition in RSR!
Small pickups restore 10. Medium pickups restore 25, and big pickups restore 50.
Weapon Pickups
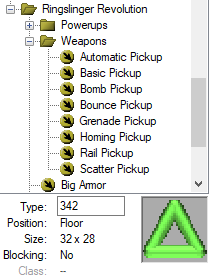
Weapon pickups provide players with the ability to fire the acquired weapon, as well as providing ammo for it. Setting the "Don't despawn in co-op" option to On will cause the weapon pickup to remain usable by everyone else after one player picks it up in co-op multiplayer netgames. Setting the "Spawn as panel" option to Yes will cause the weapon pickup to yield double the ammo.
The Basic and Rail Rings are special wepaons and, as such, do not have a "Spawn as panel" option. In fact, treat the Rail Ring as more of a powerup than a weapon, as a single shot of the Rail Ring can trivialize most encounters.
Powerups
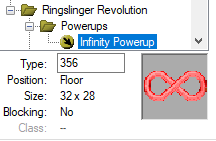
While all of the base game monitors work with Ringslinger Revolution (with the sole exception of the Recycler), Ringslinger Revolution comes with one brand new powerup of its own in the form of the Infinity Ring.
Now time for the actual guide.
What to do
- The amount of health, armor, and ammo provided dramatically changes how the level plays. If every panel for every weapon and every healing item is constantly available, players will be freely able to use their favorite or perceived optimal weapon for every situation without needing to fear much for their health or the integrity of their Shield, while if players are dry of resources, encounters will typically be played more carefully, with players thinking hard about how to get through a situation using a weapon not necessarily suited to it and most players not having access to Shields due to not having the armor to sustain them.
- Even without a Shield, armor is incredibly strong. The value of armor might not become immediately apparent, but what it essentially does is halves all incoming damage while you still have it. A player with 100 health and 100 armor will take twice as long to kill as a player with 100 health and 0 armor. For this reason, we personally prefer to make armor slightly rarer than health overall, but this is a gameplay choice rather than a strict rule.
- Each weapon has a different purpose. Supplying a lot of a specific weapon means that players will be very strong in their favorite situations, weak outside of that, and may even try to engineer these situations into existence where they’re not normally present, such as by trying to kite enemies into grouping up for use of Explosion. Once again, this can be a good or bad thing.
- Automatic hoses DPS and is good against big targets, beefy targets, or both. If you’re trying to balance the weapon selection perfectly, it may be wise to supply slightly more Automatic ammo than the rest, as it also exhausts noticeably quicker than every other weapon in the roster.
- Scatter allows players to perform risky hit-and-run tactics up close by loosing a devastating burst of damage then retreating while the weapon is on cooldown. It’s a strong opening move, but also excels when the player has to focus primarily on dodging or has plenty of cover to retreat behind.
- Explosion grants players access to splash damage to hit hordes of enemies or tag evasive players, as well as giving access to the rocket jump maneuver if enough health and armor is present.
- Grenade is difficult to use, but boasts the highest DPS in the roster. Allows massive damage to be dealt over a large area very quickly if players are good at landing direct hits.
- Bounce is good in close quarters to lay down hard-to-avoid carpets of fire or strike many enemies randomly.
- Homing is a good finishing tool for low health enemies or players, and is also the number one choice for taking down hard-to-hit airborne enemies.
- The Red Ring is a backup plan that’s only used to save ammo or when all other options are exhausted. We usually supply players with a lot of Red Rings, but doing the opposite is absolutely possible if you want players to rely more or exclusively on melee as a backup plan.
- In addition to powerups, the placement of panels and big pickups dictate where players gravitate to. Powerups are flashy and attractive, but sometimes someone just really needs, say, 80 more Automatic Rings or 50 more health, and when they get into these pretty common situations, they’re more likely to beeline for the corresponding powerup. Careful placement of bigger pickups can help funnel players around the map, say by making a risky jump more attractive by placing 50 health and armor at the end, or spreading out the weapon panels around a Match map to encourage people to constantly rotate around it and keep their ammo topped up.
- Monitors are shootable! When placing monitors, remember: if players can see it, they can obtain it. If placing a monitor that’s meant to be hard to reach, such as an Extra Life in Singleplayer or the Strong Random Monitor in Multiplayer, ensure that players have to actually reach where it’s located first before they can see and shoot it. Or maybe you don’t mind that and think it would be a good thing for your level if players can grab monitors from long range. It’s all up to what you want to do!
- Don’t place non-RSR rings in your map. They’ll spawn, but they won’t actually do anything, and remember that in these gamerules the Super Ring is a full heal. You probably don’t want to accidentally place a cache of 4 full heals out of combat thinking they were just regular Super Ring Monitors…
Singleplayer
Technical
From a technical standpoint, RSR levels are just regular singleplayer levels, with the usual progression from Player Spawn to Checkpoint to Exit Sector, only there are RSR objects along the way. So, the technicals behind building an RSR map amounts to "building a regular map with a few more objects to use". It’s more about what you’re building.
The player spawns with 100 health, 0 armor, and no ammo. Therefore, it's doubly important to provide some form of weapon immediately at the start of the level and at each checkpoint (even if it's just Red Rings!) so that the player has a fighting chance.
TL;DR
Okay, so, this is a lot of text. It's there so that people can read it all because this is basically a whole new type of map that hasn't been seen before, so of course designing for it is gonna require a different approach. But if you really can't or just don't want to read it all, we'd encourage you to... play Techno Madness, and think about what you did and didn't like about its gameplay. That'll give you a good idea of how to build an RSR singleplayer level you really like.
We built Techno Madness as a tech demo of RSR and all the thing it can do, so it contains as many scenarios as we could think of for an introduction to singleplayer RSR. So... that's a pretty good way to learn by doing!
Enemies
In RSR, enemies become a persistent threat that can survive multiple hits and stay alive long enough to attack back. As such, each individual enemy placed adds a lot more danger to the map than they would in a non-RSR level… even the basic Crawla, if there’s enough of them. As any horde shooter player will know, it’s always the little guys you don’t notice that get you. Even if you can theoretically run straight through the room, the occasional stray bullet or well-placed enemy can cost you a bit of health passing by, if not prevent you from leaving at all.
As usual, what you place dictates how the level plays. The variety of enemies you fight will dictate the diversity of tactics and weapons the player must employ, and the density of enemies affects the difficulty of the level by making the player expend more ammo to get rid of them as well as increasing the probability that they’ll take damage due to the increased amount of attacks flying around.
In RSR, enemies fall under one of a few categories each. This is by no means an exhaustive list of how to use each enemy, but it will give you a basic idea on how to design a platformer-FPS map. Every vanilla enemy is compatible with RSR. A full list of enemy stats can be found here, if you like getting that technical.
- Decorative: These enemies don't do much to threaten the player outside of extremely specific placements, and can safely be passed in almost all circumstances.
- Stupid Dumb Unnamed RoboFish
- Spinbobert
- Zombie: The basic slow crawler. Not at all dangerous if you're paying attention... can get very dangerous if you're distracted by someone else. Will probably make up the majority of the enemies in easier levels or levels containing a lot of enemies.
- Crawla
- Spring Shell
- Penguinator (slightly more dangerous)
- Flying Zombie: Like the zombie category, but a fun way to mix up encounters of any difficulty by making people do the unthinkable and look up.
- Buzz/Buggle
- Hangster
- Assault: Will probably be where the majority of a player's health loss comes from. Assault enemies are fast, aggressive, and immediately threatening, usually demanding attention even if the player plans to run past the room with minimal combat. Tend to fight you directly.
- Turret (cannot be killed via RSR attacks)
- Jet Jaw
- Bird Aircraft Strike Hazard
- Unidus
- Jetty-Syn
- Spincushion
- Cacolantern
- Bumblebore
- Assassin: Enemies that reside in the backline. Not as aggressive or prominent as assault enemies, but provide a serious threat through some sneaky means, be it long-range projectiles or hiding from the player.
- Deton
- Pop-Up Turret
- Skim
- Robo-Hood
- Minus
- Snailer
- Pophat
- Tank: These enemies soak up firepower for their allies or otherwise deny the player space in some other way, influencing where they can and cannot go in a platforming sequence or firefight. Could also be thought of as "area control" enemies.
- Crushtacean
- Banpyura
- Green Snapper
- Egg Guard
- Pyre Fly
- Gimmick: Enemies that don’t quite fit any of these categories, instead employing their own unconventional techniques with which to disrupt the player’s progress.
- Canarivore
- Pterabyte
- Miniboss: Incredibly powerful enemies that can usually withstand several volleys of the player’s most powerful weapons and strike back with frequent or hard-hitting attacks. In an easier level, a lone miniboss enemy can prove to be a climactic encounter, and using them alongside regular enemies makes for a noticeably more difficult encounter than those lacking them.
- Crawla Commander: Fast, evasive, and frequently-attacking flying unit. Small but high health.
- Lance-a-Bot: Highest health enemy on the roster. Takes a while to die even under sustained fire from Automatic or Grenade. Big, easy to hit, but fast with dangerously high melee damage.
- Dragonbomber: Flying unit that hovers out of reach of melee and drops five mines, each dealing massive damage and knockback. Easier to hit than the Crawla Commander, but still mildly evasive and high hitpoints. A massive source of friendly fire; use this knowledge as you will.
- Hive Elemental: Very healthy unit that constantly spits out Bumblebores, essentially acting as an infinite source of Jetty-Syn Bomber until destroyed. Has a major weakness in being unable to evade attacks.
Bosses
Players are able to use their weapons to fight bosses as well, and they should be provided with the means to do so, as defeating a boss with only melee attacks is a tedious and eventually boring task in RSR.
Every vanilla boss, save for Old Brak Eggman, is fully compatible with RSR (Old Brak can still be placed and fought, but he won’t interact with any of RSR’s weapons); the pain state is entered for every 1/8 of the boss’ health depleted. However, their attack patterns are designed for non-RSR gamemodes and as such may not be the most fun to fight in RSR. As a rule of thumb, the more complicated and fast-paced the battle, the more of a threat it poses to a player armed with weapon rings.
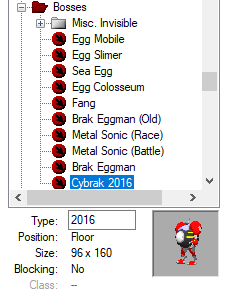
RSR additionally comes with a custom boss: "Cybrak 2016" is a one-to-one port of the Cyberdemon battle from DOOM (2016), tuned specifically for Ringslinger Revolution’s ruleset. If you want your level to have a boss, it’s a serviceable enough final foe for RSR levels.
Placing Items
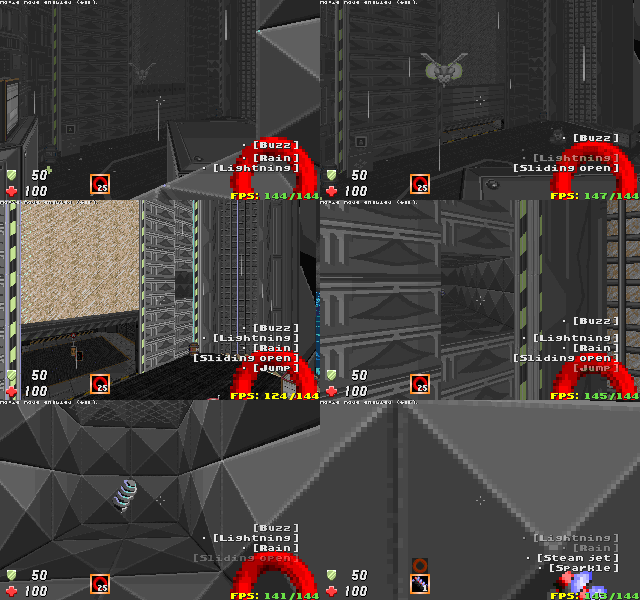
The general rules of placing items in singleplayer maps applies, only this time there’s a lot more variety in what items can be placed and what obstacles can be put in the way of a player and their items. For example, whereas a risk-reward tradeoff in vanilla may look like an incredibly tight jump leading to an Attraction Shield, in RSR this could look like a battle with a Dragonbomber on a thin walkway with a Rail Ring at the end. Or it could still look like an incredibly tight jump leading to an Attraction Shield! It’s entirely up to you how much you want to lean into the platformer aspect of RSR vs. how much you want to lean into the FPS aspect.
The items you place can compound with the difficulty of your enemies! A map with only a few zombies and the occasional assault or tank enemy might not be too difficult, but if the player isn’t provided with any health or armor pickups to recover from mistakes, this small enemy population can whittle the player down to zero health with surprising ease. Similarly, making a level with plenty of foes and several minibosses in each encounter but giving the player a nearly unlimited supply of ammo, health, and powerups can make for a chaotic level that offers a lot less challenge than one would initially assume based off the enemy count alone.
When it comes to the risk and reward of RSR items, it’s generally a good idea to follow the Multiplayer hierarchy. Big ammo and health/armor pickups are the least desirable of the desirable items, the weak powerup monitors are next, and finally the strong random monitor powerups alongside the Rail and Infinity are generally the most powerful in Singleplayer too. Don’t be afraid to hide the two super-strong rings as secrets as well as monitors! Techno Madness does this by hiding Rail and Infinity Rings around the map for players to find and use in firefights, in addition to the usual monitors.
Firefights
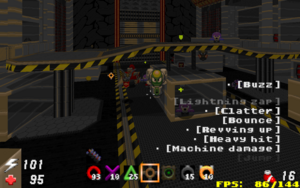
With the addition of weapon rings to singleplayer SRB2 comes the prospect of designing arenas or terrain that favors fights in general. This is up to you to figure out the best combination of enemies and terrain for your room: for example, a slope leading down into a Green Snapper could be a fun ambush, but so could trying to shoot advancing Bumblebores out of the sky as you make your way up floating platforms. There are four majorly important components to an arena:
- Verticality. Making a vertical arena influences a lot of things: If the player has a way to move from one height level to the next, grounded enemies won’t be able to follow, allowing the player to more easily control the pace of the firefight. Thus, vertical map design and airborne enemies work in tandem to dictate the threat level of the firefight. Additionally, we think more vertical firefights are generally more interesting, as they give the player more options for aiming rings and maneuvering around enemy attacks, but not every fight has to be a tower of doom.
- Space to move. The amount of space a player has dictates both how easy it is to dodge attacks and the weapon they will use. In general, giving the player more horizontal and vertical space to move means they’ll have an easier time dodging enemies and leading them around the arena. But to give a counterexample, a player armed with a full load of Bounce and Grenade and nothing else may prefer a long hallway to use said weapons to their fullest strengths and simply kill all the enemies before having to worry about dodging anything. When designing your arena, think about the resources the player is likely to have access to by the time they reach it.
- In-arena enemy and item placement. This is just everything that’s already been mentioned about how placing enemies and items in a room affects how it plays and where players go to, only that this really does become more important the longer and more complicated your firefight is. A player may feel more stressed in a large firefight with many different enemy types if there are no resources to recover from mistakes, while the inverse is true: Techno Madness’ final arena contains several minibosses, every enemy type that the player has encountered up to that point, and many many vertical levels to move through. However, pickups for every weapon as well as two powerups and a substantial amount of health and armor are scattered around the arena, giving the player substantial opportunities to recover from mistakes as well as encouraging them to keep moving around the arena to keep their supply of resources steady.
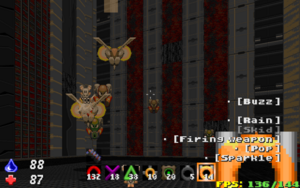
- Is your firefight mandatory? By this, we mean "does the player have to kill every enemy in the room to proceed or not?" This will change your enemy and item placement dramatically.
- If the player is free to leave the room at any time, then you must balance ease of exit by making the enemies proportionally quick to act and threatening so that the enemies have a chance to do something to a passing player, of course based on how hard you want the map to be. For example, if your room is intended to be a two second thing players can breeze past, putting a few zombies in it and nothing else may be appropriate. On the other hand, if you’re making a difficult optional firefight, it may be wise to put a coveted item in a hard to reach place in the room to incentivize the player to stay and take the firefight, or maybe you may wish to put a tank enemy at the exit to make it more difficult for the player to escape.
- If the player must survive the firefight to proceed, then the immediate speed and threat of the enemies doesn’t matter so much as their effectiveness when combined in a group the player could spend a minute or so fighting. In such a firefight, the player fights on the enemies’ terms, not the other way around. Assassins and zombies in particular tend to increase in threat the longer a firefight lasts. The most common arena for a mandatory firefight is a static enclosed box with geometry in it, but it doesn’t have to be like that: For example, Techno Madness’ elevator section is a mandatory firefight.
Finally, make sure to not make too many firefights! They’re super fun, but the toughest ones can take a minute or two, so making too many could make a level too long and exhausting for players to want to finish. It’s quality over quantity with these encounters.
Environmental Hazards
Environmental hazards are compatible with RSR! Techno Madness uses the Eggman monitor which hurts the person who shoots it, and the TNT barrel, which hurts everything in a radius around it, but such hazards as maces and firebars also work under the RSR system. Everyone knows how environmental hazards make platforming sections stand out, but they can also be used in firefights to shepherd the player or to directly threaten them as they evade everything else. And also, it’s an FPS. Who doesn’t love a well-timed explosive barrel multi-kill in their FPS games?
Map Flow
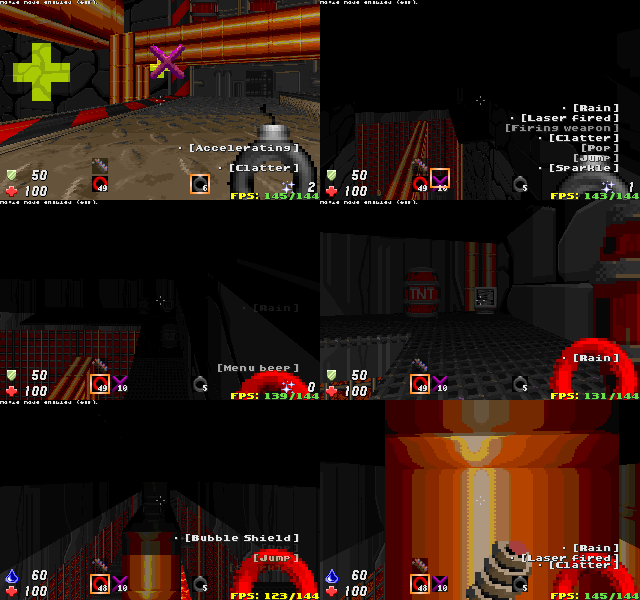
It’s considered good for an "average" level in an FPS of this style to make use of the whole arsenal and break up each mandatory firefight with less intense exploration (or even platforming) sequences filled with enemies that the player can theoretically bypass. Though secrets can of course be hidden in major arenas, these exploration sequences are a good place to hide secrets, as players won’t be as pressed for time and survival and can properly look for them at their own pace.
Having moments of downtime, perhaps even short sequences where there is no threat, is important after the most hectic firefights to let the player catch their breath. It’s also considered good form to place a checkpoint before and after each difficult firefight in the map, minorly resupplying the player before each one so that they don’t go in and end up blindsided by not having the resources to take on the room.
If you know what you’re doing, these tips can be ignored in favor of making a unique and memorable level that focuses on a particular aspect of the RSR gameplay; These tips are more aimed at making a "standard form" enjoyable RSR level.
Oh, and when hiding secrets: Remember that players can rocket jump! In Techno Madness, there’s a Liquid Shield and Rail Ring hidden above the Crawla Commander guarding the red switch, and it can be accessed as Sonic via rocket jumping onto the pipe above you. Bet you didn’t know that?
Multiplayer
Technical
From a technical standpoint, RSR levels are your regular multiplayer levels, but using the RSR object set instead of the regular object set. This means regular rings aren’t to be placed, and the rules for Random Monitors are slightly different. Outside of that, it’s the exact same.
The player spawns with 100 health, 0 armor, and no ammo. If you place a Match/CTF Team Start too far from any resources, the player might be at a frustrating disadvantage by the time they get into a fight.
Item Placement
Unless you are making a PvP map focused around a particular style of combat (for example, close-quarters combat in tunnels heavily favoring the Scatter and Bounce weapons), it is as usual considered good form to place all the weapons in roughly even distributions around the map. However, since in RSR players gain the ability to fire a weapon upon acquiring any of its pickups, the location of every pickup should be spread out roughly evenly around the map so that players don’t fuel one weapon at the expense of all the others based on where they are. The same goes for health and armor pickups: There shouldn’t be one particular section of the map that’s deficient in life pickups compared to the rest.
Regular rings aren’t placed in RSR, but they can be thought of as your life bar in regular Ringslinger. A similar thought process should be applied in Ringslinger Revolution for the health and armor pickups: Where you would have a small trail of rings somewhere, place a small health or armor pickup. Where you would have a ring trail and a Super Ring Monitor, place a medium pickup there. Perhaps what would be a major ring cache is a good thing for a big health or armor pickup and maybe an Automatic pickup or two.
When placing Weak and Strong Random Monitors, make sure that the base item is something that can be drawn from the respective pool! This is doubly important in RSR, as the Weak and Strong Random Monitors don’t share any items in their drop tables. The Weak and Strong Random Monitor drop tables can be found here.
As the Rail Ring is a power item in RSR, the Homing Ring should be used in its place for the regular ring table.
Objectives and Map Flow
A PvP map can be roughly thought of as a bunch of interconnected rooms that people run around, seeking players to shoot or objectives to complete. In CTF, the objective is obvious: It’s the flag. But did you know that each map contains two sub-objectives too? When players don’t have anything else to do, they might try their luck at going for the map’s Strong Random Monitor or Infinity Ring.
The same applies in RSR, only that there are now three sub-objectives to go for: The SRM, the Infinity Ring, and the Rail Ring, which is far more powerful in RSR. Since panels are a bit less important in RSR, a good way to design your map is to scatter each sub-objective to a different part of the map with great distance between each one, so that players will naturally want to rotate around it as they try to grab each sub-objective: Having them all makes players incredibly powerful.
The Weak Random Monitor items also generally tend to be more powerful than in normal Ringslinger, so the WRMs can serve as good "player anchors" for players to rotate between as they go from sub-objective to sub-objective.
Otherwise, normal Match map flow rules apply. However, RSR uses a proper health system (meaning players can take many hits before dying) and has player knockback implemented: Take advantage of it! Environmental hazards can be safely left around the map to watch out for while maneuvering around other players, or for crafty players to knock others into. Bottomless pits make for particularly effective hazards in this regard, able to instantly kill even a player overhealed by an Extra Life or protected by an Attraction Shield with one well-placed shot.
The lack of the Rail Ring in the regular weapons roster encourages most fights to take place at short to medium range, so designing around those ranges is considered most important in an RSR map. Failing to account for long-range may seem like it makes the Rail Ring too powerful, but players will likely only be able to fire it once or twice at most per pickup, so it isn’t an issue. It should feel powerful, after all.
Special thanks to orbitalviolet for writing the document this page is based off of.Special thanks to orbitalviolet for writing the document this page is based off of.
